Okay, so let me just say this up front—Classic Cherry Delight is one of those desserts that sneaks up on you. You make it once, you share a piece “just to be polite,” and suddenly your whole family is like, “Hey, uh… you making that cherry thing again this weekend?” You know the vibe.
I grew up seeing this at every cookout, church potluck, and honestly, any family gathering where someone remembered to bring dessert. It’s easy, it’s creamy, it’s bright red and happy-looking, and it never stays on the table for long. And hey—it doesn’t even ask you to turn the oven on. Bless.
So let me walk you through this classic dish in a way that feels like we’re just chatting in your kitchen.
Why Classic Cherry Delight Hits So Hard
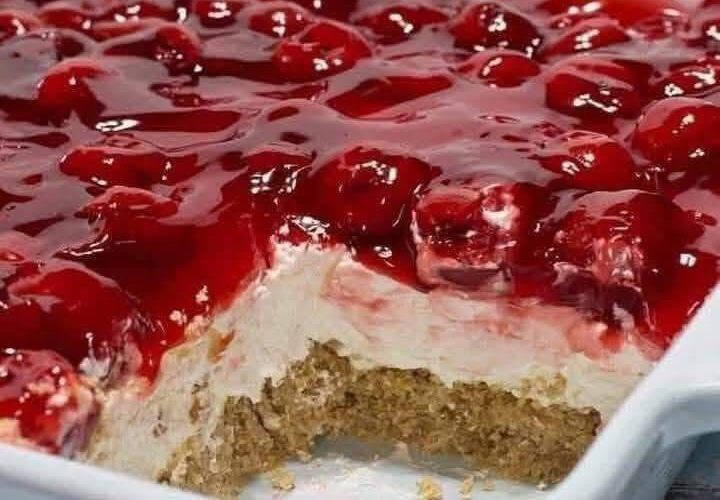
This dessert has that perfect mix of crunchy crust, fluffy cream cheese filling, and sweet cherry topping. It’s basically the dessert version of a hug. And—let’s face it—it looks fancy even though it comes together in, like, 15 minutes (not counting chill time, of course).
Plus, it brings those old-school vibes Americans love. It tastes like holidays, warm summers, and those recipes scribbled on recipe cards that somehow survive ten different kitchen moves.
Ingredients You’ll Need
Here’s everything you need for your Classic Cherry Delight. Nothing weird. Nothing expensive. Just simple dessert magic.
Crust
- 2 cups graham cracker crumbs (around 15–16 sheets)
- 1/2 cup unsalted butter, melted
- 1/4 cup granulated sugar
Cream Cheese Layer
- 1 (8 oz) block cream cheese, softened
- 1 cup powdered sugar
- 1 teaspoon vanilla extract
- 1 (8 oz) tub whipped topping (like Cool Whip), thawed
Topping
- 2 cans (21 oz each) cherry pie filling
(you can swap with blueberry, strawberry, whatever your heart wants—just saying)
How to Make Classic Cherry Delight (Without Breaking a Sweat)
1. Set Up the Crust
Alright, so this part is kinda fun.
In a bowl, stir together the graham cracker crumbs, melted butter, and sugar until the whole thing looks like wet sand—yeah, like the kind you’d use for a solid sandcastle.
Press it into a 9×13 pan. I always grab the bottom of a glass to press it down evenly. It just feels easier, you know?
Pop that pan into the fridge so it can firm up while you handle the next part.
2. Mix the Cream Cheese Layer
Grab your softened cream cheese and mix it until it’s nice and smooth. Add the powdered sugar and vanilla, then mix again until it looks super creamy.
Now, fold in the whipped topping with a spatula. No mixer here—just a gentle mix until everything blends together. This layer is fluffy and sweet and honestly… I could eat it straight from the bowl. No shame.
3. Put It All Together
Take your chilled crust out of the fridge and spread the cream cheese mixture across the top. Try to make it even, but if it’s not perfect—nobody’s judging.
Next, spoon your cherry pie filling across the top. The bright red cherries make this whole dessert look like you put way more effort than you actually did. Love that for us.
4. Chill Time (The Hardest Part, Honestly)
Cover the dish with plastic wrap and stash it in the fridge for at least 4 hours. Overnight works even better if you’ve got the patience.
This step makes everything firm up so you get those clean slices that look great on a plate.
Quick Tips to Make Your Life Easier
- If you’re short on time, throw the whole dish in the freezer for 45–60 minutes. Don’t forget it, though—I’ve done that, and well… let’s just say it turned into cherry ice cream cake.
- Make it ahead for parties. It holds up super well.
- Want it thicker? Add a little extra whipped topping to the cream cheese layer.
Final Thoughts
Classic Cherry Delight is one of those recipes that just sticks around for a reason. It’s easy, it tastes amazing, and it brings that nostalgic “American potluck” charm that feels kinda comforting, you know?
If you make it, let me know how fast it disappears—because I’m betting it won’t last long.