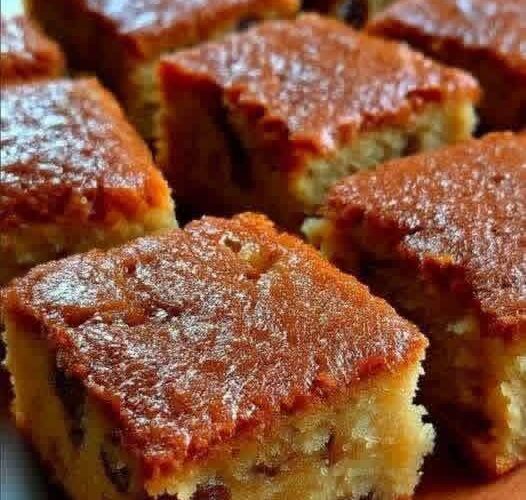
Why You’ll Love These Raisin Cake Bars
Honestly, I didn’t expect much the first time I made these… but wow. They came out soft, sweet, and just cozy—like something your grandma would sneak you after school.
Here’s why they work so well:
- Quick prep (you can mix everything in one bowl—yes, really)
- Pantry-friendly ingredients
- Perfect for lunchboxes or after-school snacks
- Soft, chewy, and just sweet enough
And let’s be real—anything you can make while your kid asks for snacks every 5 minutes? That’s a win.
🛒 Ingredients You’ll Need
Here’s everything you need to make these raisin cake bars:
- 2 cups all-purpose flour
- 1 teaspoon baking powder
- ½ teaspoon baking soda
- ½ teaspoon salt
- 1 teaspoon ground cinnamon (optional, but I love it)
- ¾ cup unsalted butter, melted
- 1 cup granulated sugar
- ½ cup brown sugar
- 2 large eggs
- 1½ teaspoons vanilla extract
- ¾ cup milk or yogurt
- 1 cup raisins
- Powdered sugar for dusting (optional)
🍳 How to Make Raisin Cake Bars (Step-by-Step)
Step 1: Preheat and Prep
First things first—preheat your oven to 350°F (175°C).
Grab a baking pan (9×13 works great), grease it lightly, or line it with parchment paper. I usually go with parchment because… less cleanup, you know?
Step 2: Mix the Dry Ingredients
In a large bowl, combine:
- Flour
- Baking powder
- Baking soda
- Salt
- Cinnamon (if using)
Give it a quick mix. Nothing fancy here.
Step 3: Combine the Wet Ingredients
In another bowl, mix:
- Melted butter
- Granulated sugar
- Brown sugar
Stir until smooth. Then add:
- Eggs (one at a time)
- Vanilla extract
Mix until everything looks creamy and well blended.
Step 4: Bring It All Together
Now, slowly add the dry ingredients into the wet mixture.
Pour in the milk (or yogurt) and mix until you get a smooth batter. Not too thick, not too runny—somewhere in between.
Fold in the raisins last. And yeah, if your kids are picky, you can sneak in fewer raisins… I won’t tell 😉
Step 5: Bake
Pour the batter into your prepared pan and spread it evenly.
Bake for 25–30 minutes, or until a toothpick inserted in the center comes out clean.
Your kitchen is gonna smell amazing at this point—just warning you.
Step 6: Cool and Slice
Let the cake cool completely before cutting into bars.
Dust with powdered sugar if you want that cute bakery-style look. Totally optional, but kinda fun.
🍽️ Tips for Busy Moms (Real-Life Hacks)
Okay, here’s where I keep it real:
- Use yogurt instead of milk for extra softness (I do this all the time)
- Make a batch on Sunday—it lasts for days
- Store in an airtight container for up to 4 days
- Freeze individual bars for grab-and-go snacks
And honestly? These taste even better the next day. I don’t know why, but they just do.
🧡 Easy Variations You Can Try
If you’re feeling a little creative (or just bored of the same thing), try this:
- Add chopped walnuts or pecans for crunch
- Toss in chocolate chips (kids LOVE this version)
- Swap raisins with dried cranberries
- Add a pinch of nutmeg for a warmer flavor
I tried the chocolate chip version once… and yeah, it disappeared in like 10 minutes.
⏱️ Quick Recipe Recap
- Prep Time: 10 minutes
- Cook Time: 30 minutes
- Total Time: 40 minutes
- Servings: 12–16 bars
💬 Final Thoughts
Look, I know how chaotic weekdays can get. Some days, even making a snack feels like a whole project.
But these Raisin Cake Bars? They’re simple, fast, and honestly kind of comforting. Like a little sweet break in the middle of a busy day.
And hey—if your kids actually eat them without complaining? That’s basically a parenting win 😄